
New article
Recently updated
Creating & Starting Synchronisation Connection

Who is this article for?OnePlace Administrators.
Farm or General Administration access is required.
This guide commences the explores creating & starting synchronisation connection, providing step-by-step instructions for administrators to create and start synchronisation connection.
1. Creating a Synchronisation Connection
- To synchronise Site Mailboxes between Exchange and SharePoint you must have at least one synchronisation connection to the Active Directory.
- You must be a farm administrator or an administrator of the User Profile Service Application to perform these procedures.
- You must be a member of the Administrators group on the computer that is running SharePoint Server.
- Verify synchronisation connection exists or create a new one.
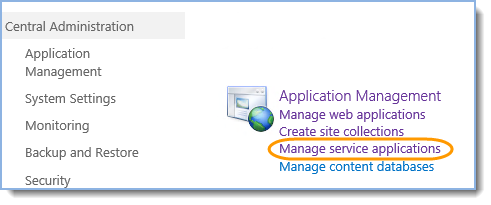
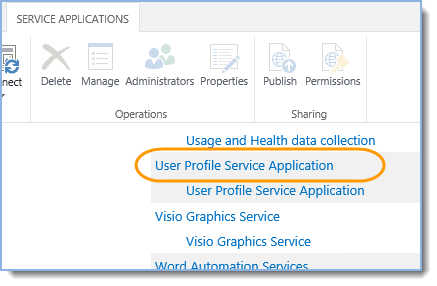
- Central Administration – Application Management – Manage service applications:
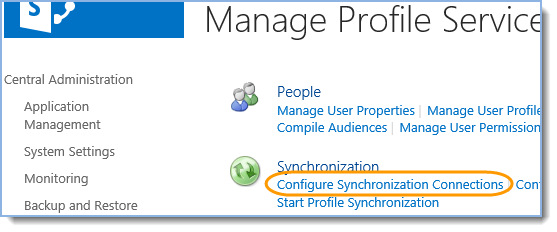
- Click on the User Profile Service Application:

- Click Configure Synchronisation Connections:
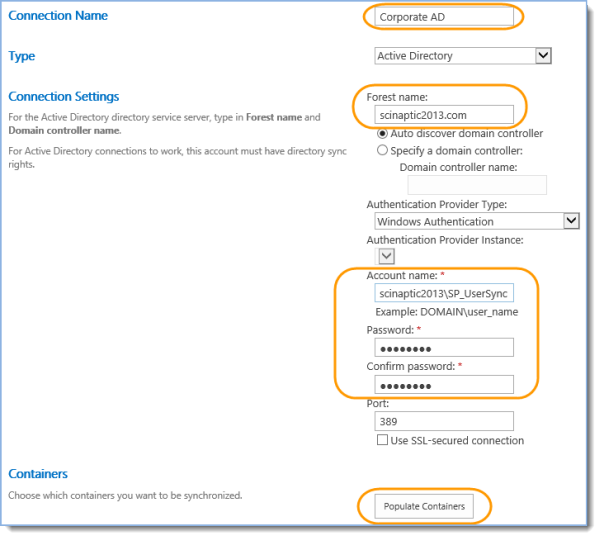
- Click “Create New Connection”; provide a connection name, forest name, account name and password. Leave the Port number and “Use SSL-secured connection” as default.
Note: For more information please refer to the Technet Article and contact your Active Directory Administrator.
- Click “Populate containers”:
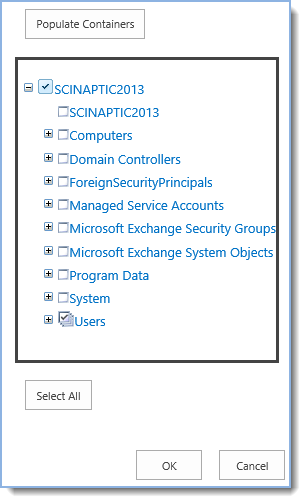
- Expand the node, select “Users” and click “OK”:
2. Start Synchronisation
- Central Administration – Application Management – Manage service applications:

- Click on the User Profile Service Application:
- Click “Start Profile Synchronisation”:
- Select “Start Full Synchronisation” and click “OK”.
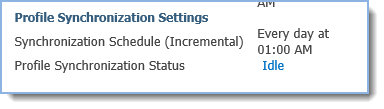
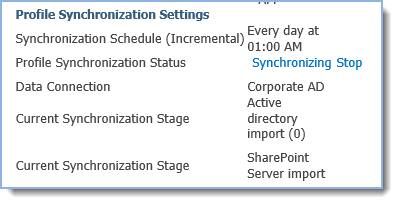
- Refresh the page and verify Synchronisation Status section changes from Idle to Synchronising and then to Idle again:
- Synchronisation in process:
- Synchronisation finished:

Tip: Ready to move onto the next stage of setting up the environment for SharePoint Site Mailboxes? See Creating & Starting App Management Service Application for more information.