


New article
Recently updated
Setting up email metadata columns manually in SharePoint

Who is this article for?
Admins who want to setup manual metadata columns or additional metadata columns.
Some SharePoint access permissions are required.
If you prefer not to use the setup email columns wizard tool, you can manually configure email metadata columns and add them to your SharePoint content types and document libraries.
You can also follow this guide to help you edit your "OnePlaceMail Email" content type to add additional custom metadata columns to capture additional custom data.
Creating the email content type
To create a new email content type:
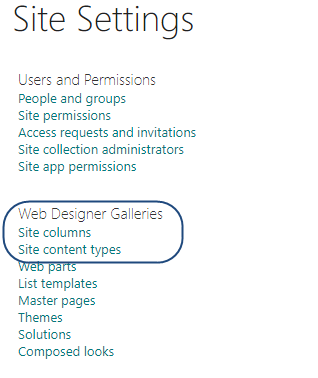
- Open Site Settings.
- Navigate to Site Content Types.
- Name the content type.
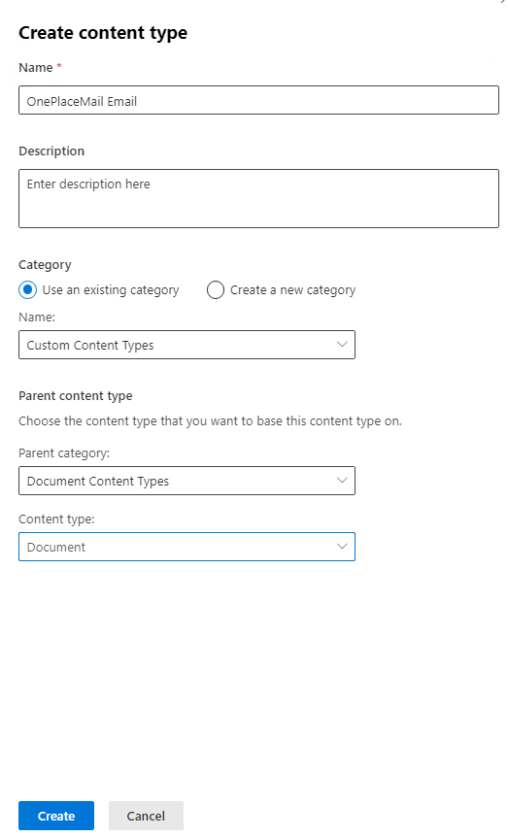
- Open the newly created content type.
- Add columns from existing site columns which were created in the previous section.
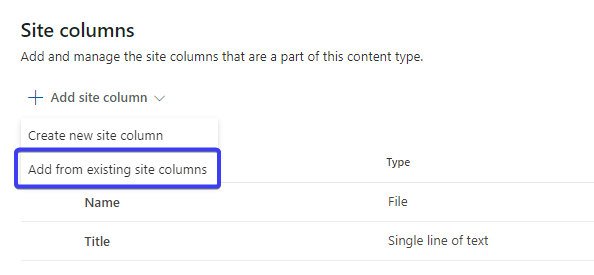
You can now use this content type and columns in any library inside your site collection.
Adding the content type to document libraries
To apply the email content type to document libraries where emails will be saved:
- Browse to the document library.
- Select Library Settings.
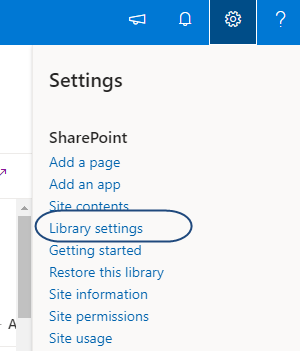
- Select Advanced Settings.
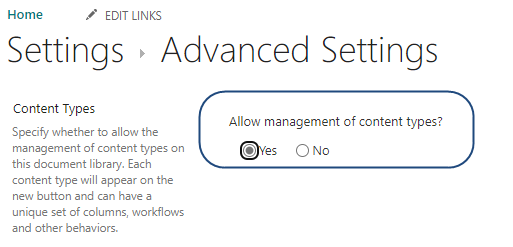
- Set Allow Management of content types to Yes.
- Select OK.
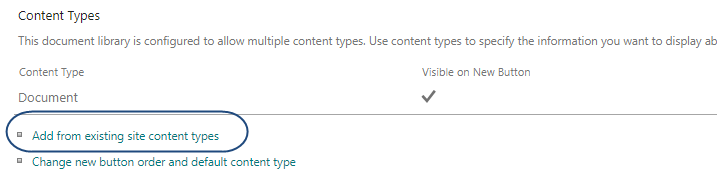
- Under Content types, select Add from existing site content types.
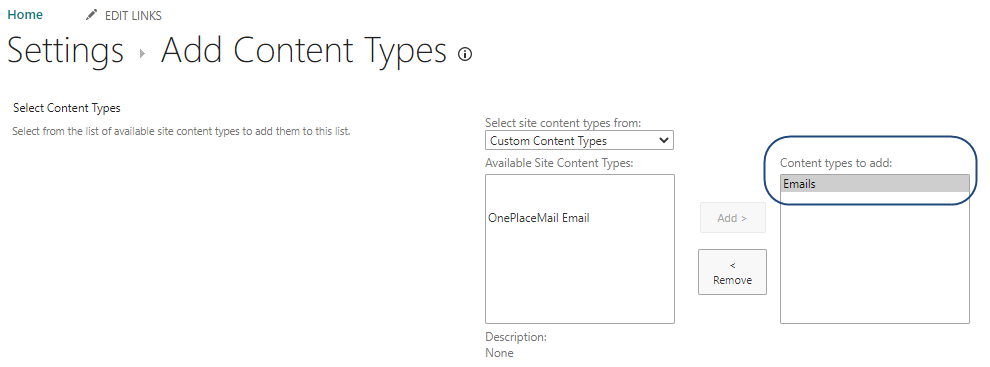
- From the drop-down menu, select the previously created email content type.
- Select Add.
- Select OK.
Creating the view for email columns
Once the content type is available in the document library, you can add email columns to the default view or create a new view.
To configure the view:
- Select Library Settings.
- Scroll down to Views.
- Select the default view or create a new view.

- Select the email columns to be added to the view.
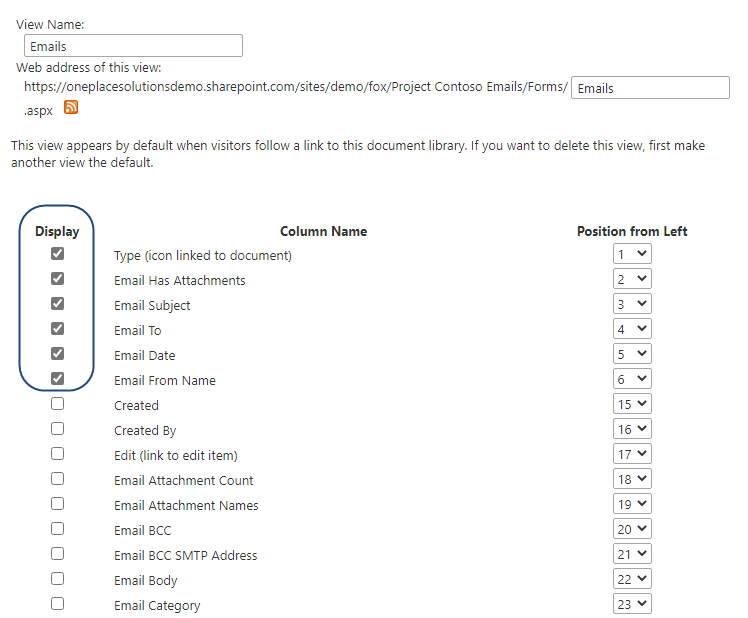
Note: To show the paperclip icon when an email has an attachment, ensure the EmHasAttachments column is added to the view.
- Select OK.
The columns will now be visible. When saving an email to the library, the email attributes will be captured and displayed.
