
New article
Recently updated
Creating & Importing Server Certificates

Who is this article for?OnePlace Administrators.
Administration access is required.
This guide marks the beginning of the process for creating Server Certificates. This introduction lays the groundwork for a step-by-step walkthrough, ensuring a smooth and effective configuration process.
1. Creating a Server Certificate
Valid certificates for both Exchange and SharePoint are required to establish OAuth Trust and Service Permissions. Follow this section to create self-signed certificate.
1.1 IIS Resource Kit Tools
By default IIS Manager creates self-signed certificates only for a Fully Qualified Domain Names. IIS Resource Kit Tools is required to create self-signed certificate for a short-name site URL.
- Download and install Internet Information Services (IIS) 6.0 Resource Kit Tools<
As you'll need only one file from it, IIS Resource Kit Tools could be installed on a local machine rather than on the SharePoint server. - Copy "c:\Program Files (x86)\IIS Resources\SelfSSL\selfssl.exe" to the SharePoint server, run CMD as Administrator and change to the directory where you saved the file.
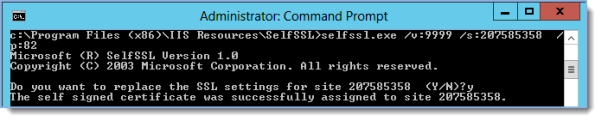
- Run the following command: selfssl.exe /v:9999 /s:<CBWAID> /p:<CBWAP>
- Where 9999 is amount of days while certificate will remain valid
- CBWAID – clams-based web application ID in IIS (207585358 on the screenshot)
- CBWAIP – port of the claims-based web-application (82 on the screenshot)
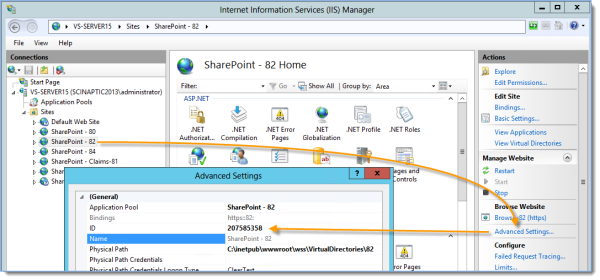
- To get the CBWAID and CDWAIP open IIS Manager, click on the clams-based site, click the “Advanced settings…” link on the right hand side of IIS and copy ID.
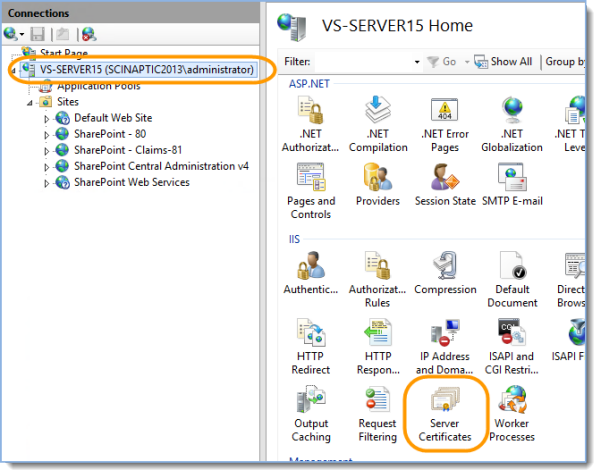
- Click on the server name in IIS Manager and open Server Certificates:
- Verify new certificate is created:

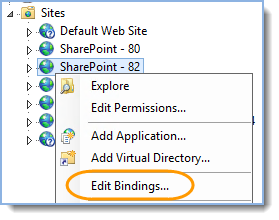
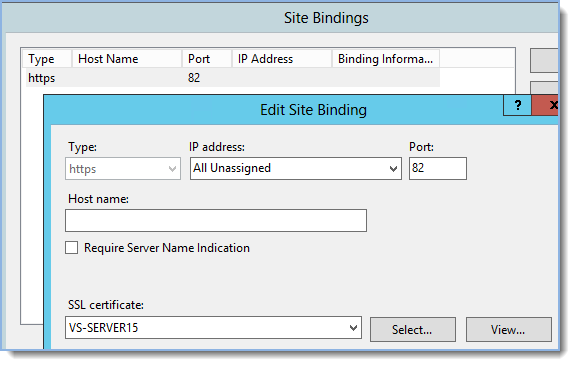
- Right-click on the clams-based site and select “Edit bindings…”
- Click Edit to verify it’s using the certificate from step e):
2. Importing the Certificates
You may need to import the Exchange Server SSL certificate from Exchange 2013 to SharePoint 2013, and from SharePoint 2013 to Exchange 2013.
This is only necessary if the certificates are self-created.
2.1 Importing Exchange Certificate
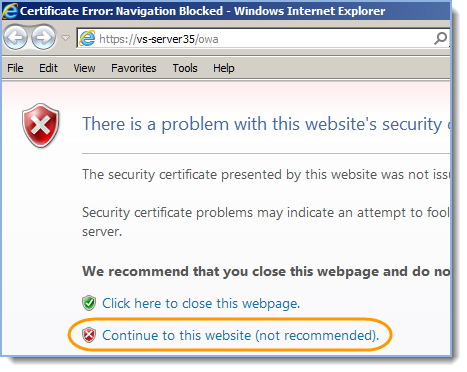
- On the SharePoint server run Internet Explorer as administrator and navigate to Outlook Web App https://<ExServerName>/owa.
- Accept to trust the certificate by clicking Continue to website:
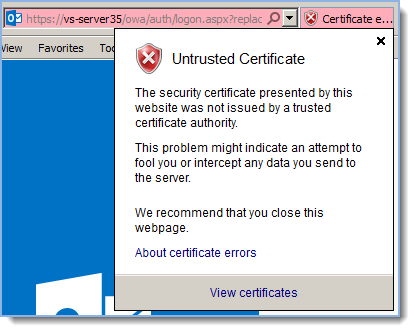
- Click Certificate Error info in Internet Explorer next to the Address bar, and then click View Certificates:
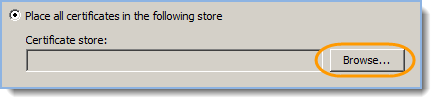
- Click Install Certificate, select “Current User”, select Place all certificates in the following store and click Browse:
- Select the checkbox to show physical stores and Install the certificate to Trusted Root Certification Authorities > Local Computer:
Local Computer: " src="https://www.oneplacesolutions.com/images/support/0109/51e.png" width="298" height="268" style="box-sizing: border-box; vertical-align: middle; max-width: 100%; height: auto; margin-right: auto; margin-left: auto; display: block;" - Close all Internet Explorer windows and try to navigate to Outlook Web App https://<ExServerName>/owa. Verify the certificate error is not displayed anymore.
2.2 Importing SharePoint Certificate
- On the Exchange server open Internet Explorer and navigate to the SSL SharePoint site https://<SP>
- Accept to trust the certificate by clicking Continue to website.

- Click Certificate Error info in Internet Explorer next to the Address bar, and then click View Certificates:
- Click Install Certificate, select “Current User”, select Place all certificates in the following store and click Browse:
- Select the checkbox to show physical stores and Install the certificate to Trusted Root Certification Authorities > Local Computer:
Local Computer: " src="https://www.oneplacesolutions.com/images/support/0109/51e.png" width="298" height="268" style="box-sizing: border-box; vertical-align: middle; max-width: 100%; height: auto; margin-right: auto; margin-left: auto; display: block;" - Close all Internet Explorer windows and try to navigate to the SSL SharePoint site https://<SP>. Verify the certificate error is not displayed anymore.
2.3 Importing SharePoint FQDN Certificate
If you are using fully qualified domain names in your organization, please follow this step.
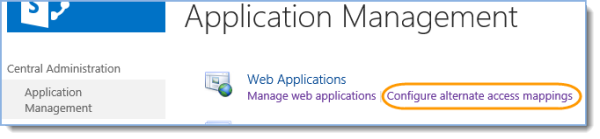
- Central Administration – Application Management – Web Applications – Configure alternate access mapping:
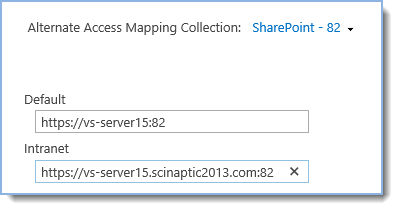
- Click “Edit Public URLs”, select created web-application and add FQDN to the “Intranet” section:
- Follow this article to configure SSL on FQDN. Scroll down to the IIS Manager section.
- Repeat 2. Importing SharePoint certificate but use SP_FQDN instead of just SP, e.g. “https://vs-server15.scinaptic2013.com:82” instead of “https://vs-server15:82”
Tip: Ready to move onto the next stage of setting up the environment for SharePoint Site Mailboxes? See Installing Exchange Web Services API for more information.